
Add images to your templates
How to add, replace and remove images in a document template, how charts and images from Word templates are handled, and why images can only sit inline.
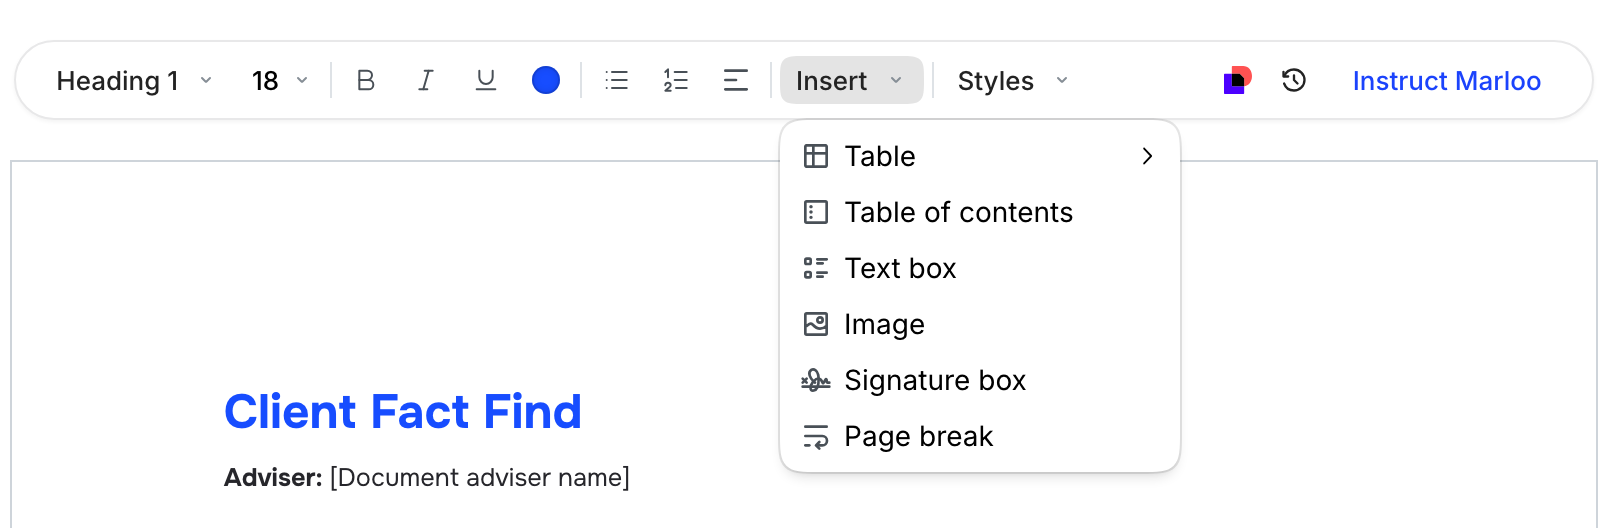
Add images to a template with Insert > Image in the toolbar. Uploaded images are stored in your image library, and an image in a template appears in every document generated from it.
Uploading images to a template
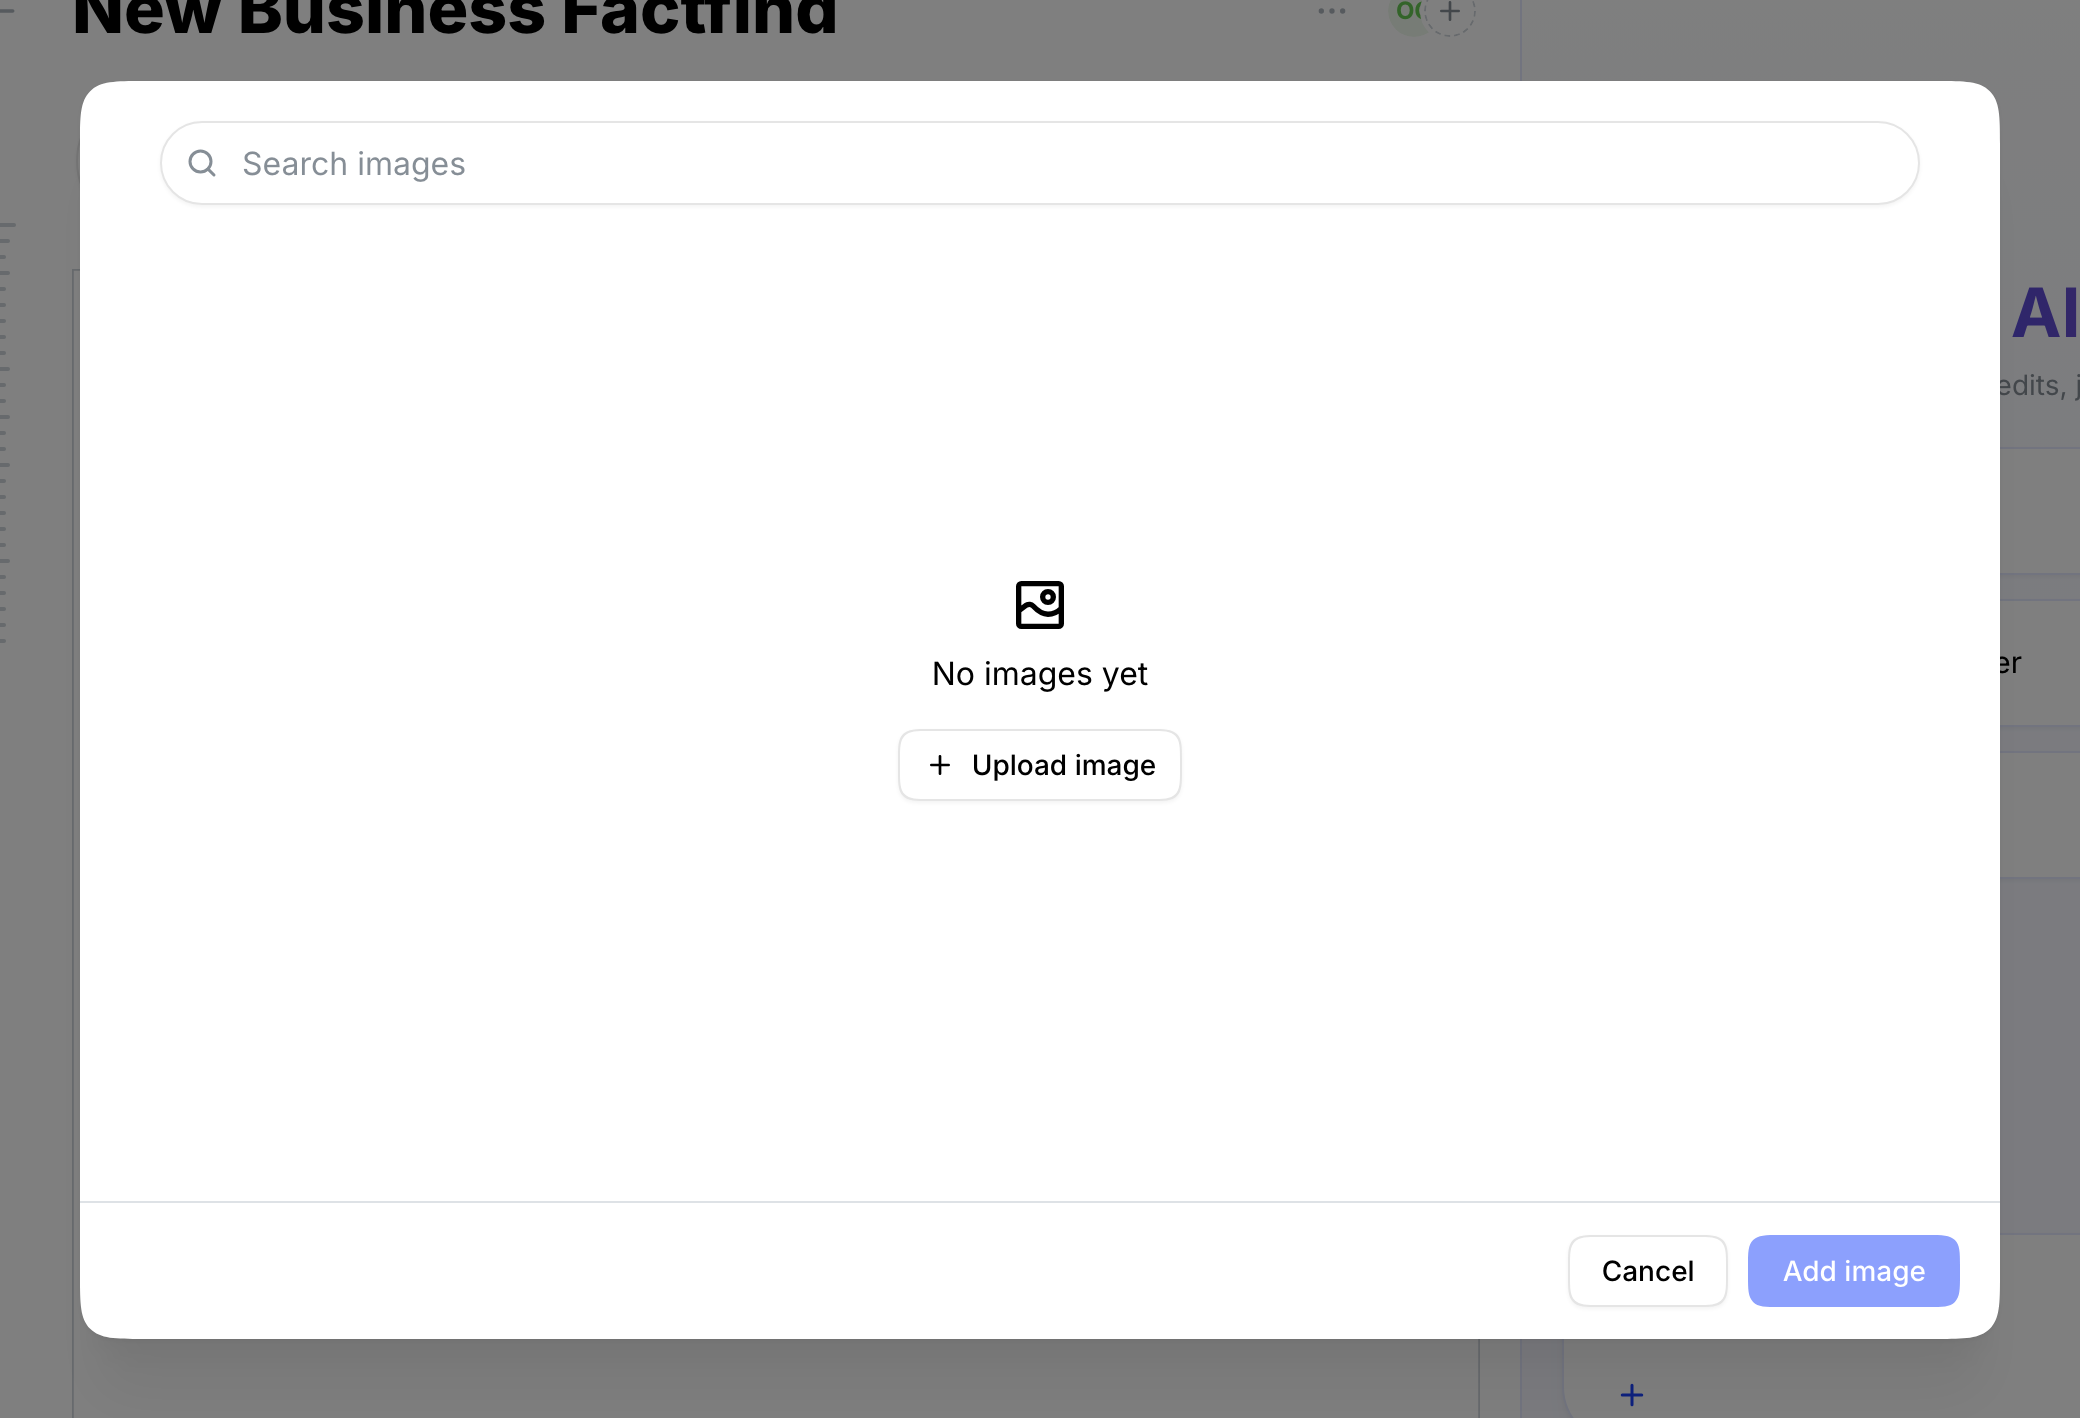
Open the template editor and choose Insert > Image in the toolbar. Select Upload image to upload a new file. This saves the image to your image library for reuse across templates.
Once uploaded, click the image in the library to insert it at your cursor position in the template.
Note: Images added to your library are available across all templates. You only need to upload an image once.
Removing or replacing an image
You delete an image from the image library from within the library itself. Open the library from Insert > Image in the toolbar, go to My images, click the ... menu on the image's card, and select Delete.
To replace an image, upload the new version. If the upload is rejected as a duplicate, delete the original from the library first, then upload the new version.
Images from uploaded document templates
If you upload a Word document as a document template and it contains images, those images pull through automatically. You do not need to re-add them via the image library.
This applies to logos, charts, tables with embedded graphics, and any other images embedded in your Word file.
Charts for a specific client
You can get a chart into a generated document in two ways, depending on whether it is a one-off or something that recurs across clients.
Ask Marloo to create it during document review. In the document review chat, ask Marloo to create the chart you want as an image. Once it has been created, select that image and include it in the document, the same way you'd add any other image at the review stage. This is the route for a chart that belongs to this client only.
Embed it conditionally in the template. If the same handful of charts keeps coming up (for example, one chart per risk profile), let the template pick the right one for each client. See Conditional images below.
Conditional images
You can give Marloo instructions to include an image only under certain conditions. This is useful for risk profile charts, product comparison visuals, or strategy diagrams that only apply to specific clients.
To set this up, upload all relevant images to your library, then add an instruction in the template such as:
"Include the Medium Risk Profile chart if the client has a medium risk profile. Include the Conservative Risk Profile chart if the client has a conservative risk profile."
Marloo will evaluate the client's context at generation time and include the matching image.

Template images or document images
An image added to a template appears in every document generated from that template. Only add an image to the template if it should appear consistently across all clients.
For one-off images, such as a chart exported from modeling software for a specific client, add the image during the document review stage instead.
Rule of thumb: If the image applies to every client, put it in the template. If it applies to this client only, add it in the document editor after generation.
Applies to both template types
Image support works the same way in both meeting templates and document templates. You can add images to either type using the same Insert > Image option and image library.
Layout limitation: inline or behind text
Images are placed inline, above or below other content. To put an image behind the text instead (for example a watermark or background graphic), click the image and choose Make behind text; choose Make inline to put it back. Side-by-side image placement (e.g., two charts next to each other) isn't supported.
If your template requires a side-by-side layout, consider combining the images into a single file before uploading.
Still need help?
See Template troubleshooting for image size, position, and generation issues.
Related articles
- Template editor - How to write and edit templates using the editor and Ask Marloo
- Manage, share, and organize your templates - How to share, organize, lock, and maintain your template library
- Template troubleshooting - Troubleshooting guide for template problems
Still stuck? Talk to a human.
Email the Marloo team with what you are seeing. If you are in the app, the blue chat button in the bottom-right corner is the fastest way to reach us.